Labels

3D Printing (24) 40K (62) Abyssal Dwarf (2) accessories (5) Adeptus Arbites (4) Adeptus Mechanicus (1) ADMech (1) Age of Sigmar (2) Agents of the Imperium (2) Angron (2) Anime (4) Antenocitis Workshop (32) Anvil Industries (5) AoS (4) ArmorCast (3) Army (4) Army Painter (10) Astra Militaria (24) Atenociti's Workshop (7) Atenocity (1) Atlantis Miniatures (4) Avatars of War (1) banner (4) base coat (16) base color (8) bases (45) Basilean (1) Battlefoam (1) Beasts (2) big lobbas (1) Bitspudlo (1) Black Scorpion (1) Black Templar (1) Blood Rain (16) Board Games (32) Bolt Action (1) Bombshell (1) Bones (14) Bretonnian (1) Bruegleburg (4) Bruxx (2) Campaign (20) carapace (1) Carnevale (8) chaos (25) Chaos Dwarf (2) chaos gate (3) Chaos Space Marines (18) Citadel (2) claw (1) Clawed Fiends (1) clear resin (1) Construction Guide (1) Contagion (12) conversion (3) Counts as (25) Craftworld Eldar (2) Custome Counters (2) Customeeple (1) Daemon Prince (4) Daemonettes (1) Daemons (5) Dark Angels (4) Dark Eldar (47) Dark Elf (6) Dark Souls (7) Darkness & Light (3) Darksword (2) Deadzone (15) Death Guard (9) decals (1) Deepcut Studios (3) Demented Games (3) dicebox (1) Dorothy (2) dragon (2) Dreadnought (5) Dreadtober (5) Drukhari (2) Dryad (1) Duncan "Shadow" Louca (1) Dwarf (7) epicast (2) Evangelion (3) Executrix (1) eyes (2) Fallout Wasteland Warfare (11) Fantasy Battles (19) Fast Panda (3) FBN (1) Fight Like a Girl (1) Finecast (4) Flames of War (4) Fluff (14) Forest Goblins (2) forge world (50) fortress (8) fortress name (2) Forward Base (10) free hand (1) Frostgrave (8) Game Mats (3) game room (1) Games Workshop (13) gamesday 2011 (1) gargantuan squiggoth (8) Geekfest 2010 (1) Geekfest 2011 (4) ghouls (1) Gloomhaven (1) Goblins (2) gobsmasha (1) golden demon (1) Greasus Goldtooth (2) greenstuff (10) Greenstuff World (1) Grotesques (3) Guest Painter (3) gunwagon (1) GW (8) GW Technical Paint (11) Halo Fleet Battles (1) Harlequin (1) Heresy Girls (5) Heresy Suppression Force (10) Hexy-Shop (1) Hi-Tech (2) highlight (2) horror (1) Imperial Guard (23) Infinity (23) Inquisition (4) Iron Empire (17) Iron Halo (1) Jailbirds (35) Joan of Arc (3) JR Miniatures (1) juggernaut (10) khorne (1) Kickstarter (43) Kill Team (1) Kingdom Death (17) Kings of War (9) Kromlech (3) KST (4) Kurganova (3) Land Raider (1) Large Scale (4) Lead Adventurers (3) legacy models (2) lighting (7) Lizardman (1) Lost Islands KS (2) lust elves (12) made for Infinity (33) Malice (1) Malifaux (13) Mantic (37) mawloc (1) max mini (2) MDF (28) mecha (3) Mechanicum (1) Mercenary Grots (1) Metallic (1) Miniature Figure Painting (7) miniature wargames scenery (3) model building (4) Modiphius (2) Mordheim (24) Movement Trays (1) moving (6) Mystery (4) Mythic Games (1) names of things (14) narratives (22) Necrons (3) Night Goblins (1) Nose Art (1) Nurgle (16) objective markers (2) Obliterators (2) Ogre Kingdoms (6) Oldhammer (4) orange (1) Orcs (1) ork (26) osl (2) P3 (1) Patreon (1) Plague (1) Plastic (4) Post Apocalypse (8) Pre-Heresy (2) Primarch (2) Primer (6) Privateer Press (1) Project Thunderhawk (28) prototyping (1) Proxies (24) ptimer (1) Rackham (2) Raging Heroes (125) Rampage (6) Ravager (1) razorwing (1) Realm of Chaos (1) Reaper (34) red (25) repair (6) resin (27) Resurrectionist (2) Resurrectionists (1) Retinue (1) review (1) ripper swarm (6) ripperswarm (1) Roleplaying (1) RPG (31) runtbot (7) Sacred Heart (1) scatter (7) Sci-Fi Space Battles (6) Scibor (2) Secret Weapon (77) Serene Dawn (12) Setting the scene (23) Shading (1) Silver Compass Designs (1) Sisters of Battle (25) Sisters of Eternal Mercy (11) Sisters of Sigmar (4) Skaven (4) Skin (2) Skirmish Game (8) Slaanesh (1) Slann (1) SnapMaker (5) Spartan Games (1) Sslyth (1) Star Saga (32) Starfinder (4) Steampunk (2) Stone Crusher (3) Strigoi (1) studio (1) Studio Miniatures (1) Studio Swelter (4) SUPERCaT (1) Supers (1) Tabletop (9) Tabletop Art (3) Tabletop World (36) tank pit (1) Tantalus (6) Terminator (2) terrain (58) TGG (20) TGG the Game (3) TGG2 (22) The Dickensians (2) The Old World (2) The Order of Vampire Hunters (13) The World That Was (1) Theme (33) Third Party conversion bits (1) Thor Minatures (1) Thousand Sons (1) thunderhawk (3) Titanite Demon (1) tools (2) Toughest Girls in the Galaxy (9) Toughest Girls of the Galaxy (6) Toughest Girls of the Galaxy 2 (7) trukk (3) tutorial (2) Twisted (7) tyranid (12) UAF (1) Ubiquitous Rat (1) unboxing (4) Undead (2) undercoats (4) Undertown (15) Unwritten (5) Urkin (1) Vallejo (5) Vampire Counts (4) Vampire Hunter (2) Vampires (1) Vampiric Flesh (1) Vanguard (4) varnish (2) Vatican (3) vehicle (13) Venom (3) Video (1) Vikings (1) Void Elf (17) Void Elves (15) War Machine (1) War World Scenics (1) Warbands (3) Warchimera (3) Warhammer (12) Warpath (18) wash (33) water effects (17) weathering (61) weathering powder (14) WFB (1) WH40K (40) WHFB (14) WiP (22) Witch Hunters (5) wood (2) Wood Elf (4) World Eaters (2) Wracks (1) wraiths (1) WW2 (1) Wyrd (5) yellow (1) Ynnari (5) Zoggit (1) zombies (1)

Wednesday, October 20, 2010

Adding dimmer and a working name

No photos today.  I've decided to add in a dimmer so I can trim the level of light the spotlights put out.  For most viewing, in a well lit room, they are probably fine but in lower light situations and for photography purposes I'd like to be able to regulate the amount of light they put out.  The searchlights are on their own board but share a power supply with the board that controls the navigation lights.  I'll have to add in a pot to adjust only the board running the searchlights.  Fortunately there seems to be several spots on the hull where I can conceal the pot.

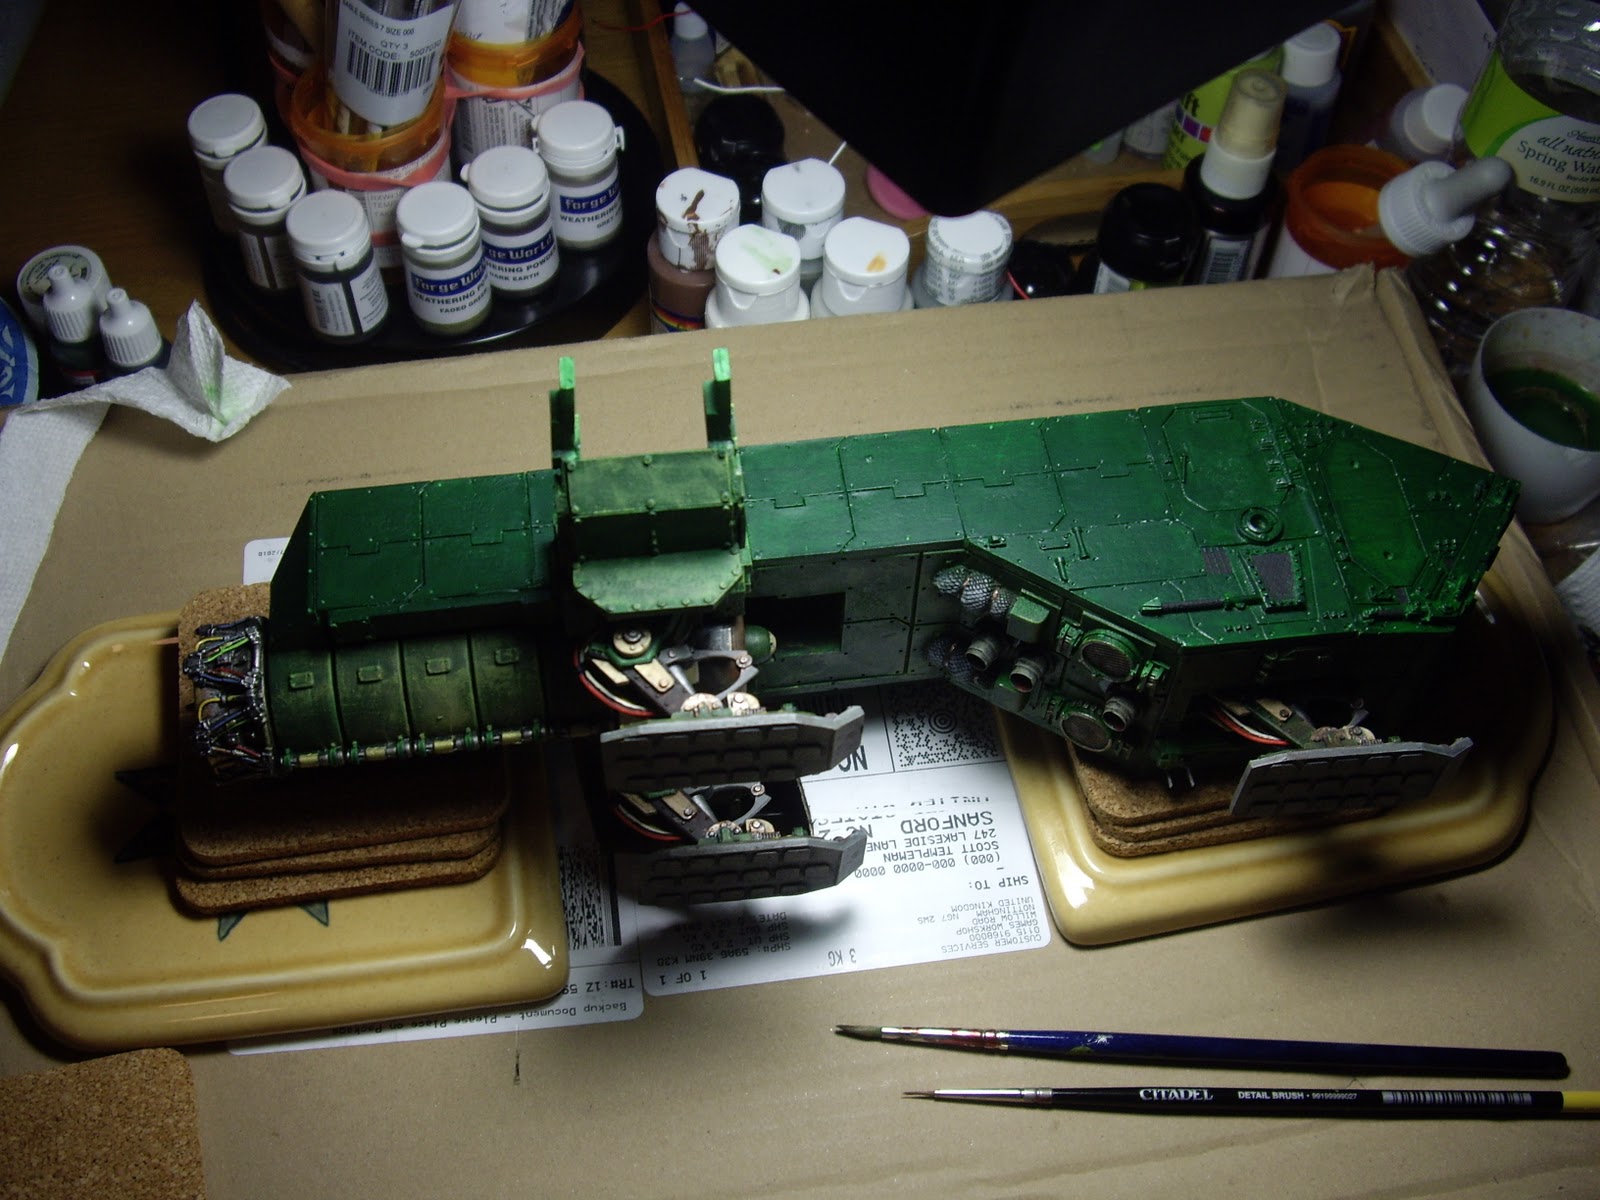
Otherwise I'm currently working on base coats for the upper hull sections and weathering the upper wing plates.  I wand to add the engines and upper wings soon because they bear the load of the main wing and keep it in alignment.  I can't finish that until I finalize the electronics though because the beastie will effectively be a sealed unit once the upper wings are installed.

As near as I can tell the naming conventions for the Dark Angels are very GW latin Dante-esque things so I've about settled on a name.

Caedis Irae


Maybe Frank can translate it for me... just to see if it doesn't really mean "Made of Fail" or something similar.
Or, since I haven't put the name on it yet maybe you can recommend something that works in the fact that this is the all metal version of the Thunderhawk....  Ferrus Ira(e) (not sure of the gender of Ferrus) or hmmm....

Sunday, October 17, 2010

Lights on

 The lights went on today.  The power coupling issue turned out to be a short due to an insufficiently wide opening damaging some insulation.  The cockpit lights turned out not to be a failure of pre-installation testing but rather that I physically broke one of the leads on the LED while positioning the cockpit.  That's all fixed and the cockpit is installed .. for the third (and hopefully final) time.

The searchlight fall areas are roughed in although the final layout will depend on how I approach the off board lights that should illuminate the upper structure of the model.
It is possible that the on board lights will be illumination landing crew work spaces instead of the landing gear.  From here I'll have to do the engines and upper structure.  I'm a little concerned about the Canard installation as I've closed the forward hull.  I've got them on long brass rod so it "should" be fairly straight forward to slide them into position even with the hull closed.  The top isn't pinned on so I could rip it out if need be.
Here you should be able to make out some of the cockpit lighting.  The fail photography doesn't help here but I'm happy with the way it turned out.  there are some illuminated buttons floor light and some side panel effects.  Its all pretty low key.

The next element that I'm really not looking forward to is adding the upper wing assembly.  Hopefully I've got the wings in good alignment when it comes time.  The wing engines will have to go on before the top wing is added and that sharply limits what little flexibility there is in the wing assembly.

Friday, October 15, 2010

Adventures in electricity.

Most of the last couple of days has been spent installing the wiring harness.  Day one it went all together but failed to actually work.  After a bit of head scratching on day two I got it all going but discovered that the blue LED for the cockpit displays had come loose.  This resulted in a rip out of the cockpit and then gluing the LED into its position in the mounting bracket.    After some cussing the cockpit got back into position.  It was a tricky process and required some minor repositioning of the pilots and some touch up of the dings they got on the way in.  I then relit the harness and discovered that the Blue LED is now dead...   I'm going to sleep on it but I think I may have to replace the LED.   The other major problem is that, while the light harness works when connected to the power supply, the actual off-board power coupler does not. I'll have to do some more tests to sort that.

Thursday, October 14, 2010

Seachlights and Guns

 The forward gun sponsons are painted up and ready to install.  This won't happen for a bit yet as they (and many other detail bits) will make extensive handling of the model more complicated.  They'll be added after the superstructure is complete.  I'm currently sorting out lettering details before adding the lower wing assemblies.
Here are the roughed in searchlights.  I'm adding some stress reducers for the wires as the lights will be adjustable in most directions until their final positioning.  I need to weather the gaskets nearest the light housing to remove the shine and touch up some glue stains around the base of the sleeves.  You can also see the power coupling for the off-board power supply.  This will get a servitor carrying the power wire as part of the display base.

Friday, October 8, 2010

A jig, an engine and some dirt.

 Engine intake cowls are finished they were primed black then painted Bolt Gun Metal followed by a brush up of Dwarf Bronze and a really off color Shining Gold (All Workshop).  The final highlights are Rustungs Farbe which I believe is a Gamecraft paint labeled for the Fantasy Forest Hobby shop.
 The cockpit got a liner to reduce the effect of the back wall not being quite square.  I am still sorting out if I want to leave this shroud in place or replace it with some wire bundles.  The border of the cockpit has been painted in black and yellow industrial stripes since this photo was taken.  I'm still trimming the stripes and am not certain that I've gotten them to line up 100% yet. A large Imperial eagle has been added just in front of the cockpit and covers the surface flaw completely.

 I had to make a jig to hold the model on its side while I start weathering and detailing.  The jig has a hole in it to accommodate the wing struts and some cork coasters to hold the thing in place without damage.There are several hard decorative bits to attach as well as the bow bolter sponsons that will have to wait until both sides have had been nearly finished.
Here is some of the weathering.  There are several vents that have exhaust stains and a little battle damage as well as some just plain grime here.  I'll add flat art at this point and then adjust the weathering again before sealing it and flipping the model to do the other side.

Monday, October 4, 2010

Skids

 The Landing skids are just about ready to be installed.  I think there remains a little bit of work to do on the actual cylinders.  I'd like to add some oily residue and then polish the main cylinder surface.    The searchlight mountings are painted and installed. Once the skids go on I'll be able to run the actual light housings.  The main issue with the searchlights is that they won't be adjustable once the model is complete.  I'm thinking about ways to make the laterally mobile.. at least in a small arc but that would be the extent of it.  This means I'll likely have to wait to lock down their final facing until the model is essentially complete.


Next step is to weather the lower wing assemblies.  Ideally I can finish all of the underside weathering and not have to deal with lifting the model much after that.

Saturday, October 2, 2010

Cockpit in -- Underside weathering in progress

The cockpit is installed now and the undercarriage and landing gear are painted and weathered to the point that they can be installed as well.  Once the landing gear are in I can add the search lights.

Finishing the painting and weathering of the undercarriage will put the project in striking distance of adding in the engines and the lower wing assemblies.


I'm a little concerned that the forward landing gear well may be a weak point in the long term load bearing.  The forward landing gear are supported entirely on a thinned hull section.  My guess is that it may deform over time so I'm considering having the model settle slightly to the rear to focus the load in that direction.