Labels

3D Printing (25) 40K (62) Abyssal Dwarf (2) accessories (5) Adeptus Arbites (4) Adeptus Mechanicus (1) ADMech (1) Age of Sigmar (2) Agents of the Imperium (2) Angron (2) Anime (4) Antenocitis Workshop (32) Anvil Industries (5) AoS (4) ArmorCast (3) Army (4) Army Painter (10) Astra Militaria (24) Atenociti's Workshop (7) Atenocity (1) Atlantis Miniatures (4) Avatars of War (2) banner (4) base coat (16) base color (8) bases (45) Basilean (1) Battlefoam (1) Beasts (2) big lobbas (1) Bitspudlo (1) Black Scorpion (1) Black Templar (1) Blood Rain (16) Board Games (32) Bolt Action (1) Bombshell (1) Bones (14) Bretonnian (1) Bruegleburg (4) Bruxx (2) Campaign (20) carapace (1) Carnevale (8) chaos (25) Chaos Dwarf (2) chaos gate (3) Chaos Space Marines (18) Citadel (2) claw (1) Clawed Fiends (1) clear resin (1) Construction Guide (1) Contagion (12) conversion (3) Counts as (25) Craftworld Eldar (2) Custome Counters (2) Customeeple (1) Daemon Prince (4) Daemonettes (1) Daemons (5) Dark Angels (4) Dark Eldar (47) Dark Elf (6) Dark Souls (7) Darkness & Light (3) Darksword (2) Deadzone (15) Death Guard (9) decals (1) Deepcut Studios (3) Demented Games (3) dicebox (1) Dorothy (2) dragon (2) Dreadnought (5) Dreadtober (5) Drukhari (2) Dryad (1) Duncan "Shadow" Louca (1) Dwarf (7) epicast (2) Evangelion (3) Executrix (1) eyes (2) Fallout Wasteland Warfare (11) Fantasy Battles (19) Fast Panda (3) FBN (1) Fight Like a Girl (1) Finecast (4) Flames of War (4) Fluff (14) Forest Goblins (2) forge world (50) fortress (8) fortress name (2) Forward Base (10) free hand (1) Frostgrave (8) Game Mats (3) game room (1) Games Workshop (13) gamesday 2011 (1) gargantuan squiggoth (8) Geekfest 2010 (1) Geekfest 2011 (4) ghouls (1) Gloomhaven (1) Goblins (2) gobsmasha (1) golden demon (1) Greasus Goldtooth (2) greenstuff (10) Greenstuff World (1) Grotesques (3) Guest Painter (3) gunwagon (1) GW (8) GW Technical Paint (11) Halo Fleet Battles (1) Harlequin (1) Heresy Girls (5) Heresy Suppression Force (10) Hexy-Shop (1) Hi-Tech (2) highlight (2) horror (1) Imperial Guard (23) Infinity (23) Inquisition (4) Iron Empire (17) Iron Halo (1) Jailbirds (35) Joan of Arc (3) JR Miniatures (1) juggernaut (10) khorne (1) Kickstarter (43) Kill Team (1) Kingdom Death (17) Kings of War (9) Kromlech (3) KST (4) Kurganova (3) Land Raider (1) Large Scale (4) Lead Adventurers (3) legacy models (2) lighting (7) Lizardman (1) Lost Islands KS (2) lust elves (12) made for Infinity (33) Malice (1) Malifaux (13) Mantic (37) mawloc (1) max mini (2) MDF (28) mecha (3) Mechanicum (1) Mercenary Grots (1) Metallic (1) Miniature Figure Painting (7) miniature wargames scenery (3) model building (4) Modiphius (2) Mordheim (24) Movement Trays (1) moving (6) Mystery (4) Mythic Games (1) names of things (14) narratives (22) Necrons (3) Night Goblins (1) Nose Art (1) Nurgle (16) objective markers (2) Obliterators (2) Ogre Kingdoms (6) Oldhammer (4) orange (1) Orcs (1) ork (26) osl (2) P3 (1) Patreon (1) Plague (1) Plastic (4) Post Apocalypse (8) Pre-Heresy (2) Primarch (2) Primer (6) Privateer Press (1) Project Thunderhawk (28) prototyping (1) Proxies (24) ptimer (1) Rackham (2) Raging Heroes (125) Rampage (6) Ravager (1) razorwing (1) Realm of Chaos (1) Reaper (34) red (25) repair (6) resin (28) Resurrectionist (2) Resurrectionists (1) Retinue (1) review (1) ripper swarm (6) ripperswarm (1) Roleplaying (1) RPG (31) runtbot (7) Sacred Heart (1) scatter (7) Sci-Fi Space Battles (6) Scibor (2) Secret Weapon (77) Serene Dawn (12) Setting the scene (23) Shading (1) Silver Compass Designs (1) Sisters of Battle (25) Sisters of Eternal Mercy (11) Sisters of Sigmar (4) Skaven (4) Skin (2) Skirmish Game (8) Slaanesh (1) Slann (1) SnapMaker (5) Spartan Games (1) Sslyth (1) Star Saga (32) Starfinder (4) Steampunk (2) stl (1) Stone Crusher (3) Strigoi (1) studio (1) Studio Miniatures (1) Studio Swelter (4) SUPERCaT (1) Supers (1) Tabletop (9) Tabletop Art (3) Tabletop World (36) tank pit (1) Tantalus (6) Terminator (2) terrain (58) TGG (20) TGG the Game (3) TGG2 (22) The Dickensians (2) The Old World (2) The Order of Vampire Hunters (13) The World That Was (1) Theme (33) Third Party conversion bits (1) Thor Minatures (1) Thousand Sons (1) thunderhawk (3) Titanite Demon (1) tools (2) Toughest Girls in the Galaxy (9) Toughest Girls of the Galaxy (6) Toughest Girls of the Galaxy 2 (7) trukk (3) tutorial (2) Twisted (7) tyranid (12) UAF (1) Ubiquitous Rat (1) unboxing (4) Undead (2) undercoats (4) Undertown (15) Unwritten (5) Urkin (1) Vallejo (5) Vampire Counts (4) Vampire Hunter (2) Vampires (1) Vampiric Flesh (1) Vanguard (4) varnish (2) Vatican (3) vehicle (13) Venom (3) Video (1) Vikings (1) Void Elf (17) Void Elves (15) War Machine (1) War World Scenics (1) Warbands (3) Warchimera (3) Warhammer (13) warhammer the old world (1) Warpath (18) wash (33) water effects (17) weathering (61) weathering powder (14) WFB (1) WH40K (40) WHFB (14) WiP (22) Witch Hunters (5) wood (2) Wood Elf (4) World Eaters (2) Wracks (1) wraiths (1) WW2 (1) Wyrd (5) yellow (1) Ynnari (5) Zoggit (1) zombies (1)

Saturday, February 3, 2018

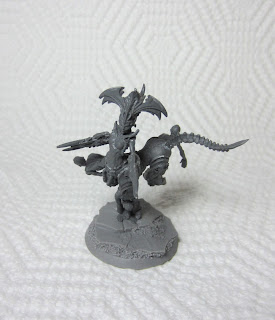
Lust Elf Centaurs (SF ver.) assembled

I am guessing that Benoit over at Raging Heroes has some really, really, really scary nightmares...

Fortunately when he wakes up those demented dreams get translated into spectacular miniatures for all the rest of us!

I just finished building this unit of Lust Elf Centaurs and they are from some of the more disturbing of the nightmare creatures that have escaped his fevered dreams...
 These are the Sci-Fi versions and, if I'm clever, I'll build the fantasy versions next... right after the Sci-Fi Centaur Champion of course!  Reason being is that these are complex miniatures... really more accurately... model kits as each one has 23 parts (excluding the base) and it took me until the third one to come up with an efficient building process.

The first three models took me a couple of days to sort out then I got the hang of it and the remaining ones were finished in an afternoon.
The process I settled on is:

1. Keep each model separate from the others and do not mix the parts.  The models are shipped segregated in bags based on the number of points of contact with the base.  Each model has a unique letter system so you can safely build each bag out of the pile.

2. Completely build each model before moving to the next. Even when working out of a bag of two models.

3. Remove the parts from the sprue ONLY as they are needed.  The parts have letter codes that make construction much easier.  Just match the letters (M to M etc).  There is room for posing and variation within the matched parts and, of course you can swap some around but you'll want to get a feel for the way the models work before doing a lot of that.


4. Clean the part, prefit the part and trim if necessary,  and install it before moving to the next part.

5. The order the parts are fitted makes a huge difference.  This is why the first model took longer to build than the final three.

Here is my part building priority:

1. Find the point(s) of contact part.

2. If there is a single point of contact part construct the torso by finding the torso part with the same letter code as the point of contact piece.  Attach the matching head making sure that it is facing in the proper direction.  Just look for the ribs and abs and put the head on facing in that direction.

 Then attach the point of contact arms to the torso.  If you line the parts up to look as natural and seamless as possible you will likely be in the right alignment.  Its a good idea to clean up and/or fill this join at this point since access to it may be limited later.

Attach the newly constructed "leg" to the main body of the model being careful to fit it at an angle that will make your model stand the way you want it too.  The main body has channels and tightly fitting this first piece into the channels will usually do the trick but you can vary the attitude and angle quite a lot if you desire.

I used Super glue on one face and accelerator on the other which helped immensely but required rigorous pre-fitting before making the adhesion attempt.
 2a.  If the model has two points of contact build one just that same as if it were a single and attach it to the main body.  Build the second assembly the same way always following the pattern of:

head to torso
Arm of contact to torso
second arm to torso
torso to main body

When attaching the second torso assembly make sure the (2) points of contact share a level plain and glue the second assembly into place.

3. Attach the assembly to the base.

4. Build each remaining torso assembly (head to torso, arms to torso) and attach them to the main body.

5. Attach the upper torso.  These have a great alignment with the abs in the center while still having great dynamic twists in the upper shoulder area.

6. Add the arms.  These are one piece each.

7. Assemble the Head (2 parts)


8. Add the head.


9. Go back through the model and get any cleaning and filling that might remain.  There should not be much as you will have done this as you went... lots of fiddly bits to dodge if you skipped the cleanup during the build!

These are pretty large models that I will be using as proxies for Drukhari Grotesques... especially in Ynnari builds.  You can see Canonness Veridyan for scale.

Below is the group of six.


Today's goal... build Centaur Champion Keshirii (SF)

Then I might have to knock out building the fantasy versions of these while I remember how to do it!  I think there are nine of those plus the fantasy version of the champion... then... whew... back to painting!

I didn't realize I'd do a building commentary so didn't take pictures during the build. When I do the Fantasy versions I'll make some step by step photos.

2 comments:

  1. Dude. Those are fantastic! I'm actually kind of glad I'm broke right now, because otherwise I think my Slaanesh Daemon would have just doubled in size ;) Def gonna have to pick up some of the lust elf line for them at some point.

    ReplyDelete
    Replies
    1. Yeah! These are really amazing models! The whole TGG2 project is an evolution in materials and design from the TGG project. They are easier to work on and, at the same time, are edgier and more ambitious. I'm having having a lot of fun and getting a lot of inspiration from them! They'll be perfect Slaaneshi nightmares when you get round to them.

      Delete