Labels

3D Printing (25) 40K (62) Abyssal Dwarf (2) accessories (5) Adeptus Arbites (4) Adeptus Mechanicus (1) ADMech (1) Age of Sigmar (2) Agents of the Imperium (2) Angron (2) Anime (4) Antenocitis Workshop (32) Anvil Industries (5) AoS (4) ArmorCast (3) Army (4) Army Painter (10) Astra Militaria (24) Atenociti's Workshop (7) Atenocity (1) Atlantis Miniatures (4) Avatars of War (2) banner (4) base coat (16) base color (8) bases (45) Basilean (1) Battlefoam (1) Beasts (2) big lobbas (1) Bitspudlo (1) Black Scorpion (1) Black Templar (1) Blood Rain (16) Board Games (32) Bolt Action (1) Bombshell (1) Bones (14) Bretonnian (1) Bruegleburg (4) Bruxx (2) Campaign (20) carapace (1) Carnevale (8) chaos (25) Chaos Dwarf (2) chaos gate (3) Chaos Space Marines (18) Citadel (2) claw (1) Clawed Fiends (1) clear resin (1) Construction Guide (1) Contagion (12) conversion (3) Counts as (25) Craftworld Eldar (2) Custome Counters (2) Customeeple (1) Daemon Prince (4) Daemonettes (1) Daemons (5) Dark Angels (4) Dark Eldar (47) Dark Elf (6) Dark Souls (7) Darkness & Light (3) Darksword (2) Deadzone (15) Death Guard (9) decals (1) Deepcut Studios (3) Demented Games (3) dicebox (1) Dorothy (2) dragon (2) Dreadnought (5) Dreadtober (5) Drukhari (2) Dryad (1) Duncan "Shadow" Louca (1) Dwarf (7) epicast (2) Evangelion (3) Executrix (1) eyes (2) Fallout Wasteland Warfare (11) Fantasy Battles (19) Fast Panda (3) FBN (1) Fight Like a Girl (1) Finecast (4) Flames of War (4) Fluff (14) Forest Goblins (2) forge world (50) fortress (8) fortress name (2) Forward Base (10) free hand (1) Frostgrave (8) Game Mats (3) game room (1) Games Workshop (13) gamesday 2011 (1) gargantuan squiggoth (8) Geekfest 2010 (1) Geekfest 2011 (4) ghouls (1) Gloomhaven (1) Goblins (2) gobsmasha (1) golden demon (1) Greasus Goldtooth (2) greenstuff (10) Greenstuff World (1) Grotesques (3) Guest Painter (3) gunwagon (1) GW (8) GW Technical Paint (11) Halo Fleet Battles (1) Harlequin (1) Heresy Girls (5) Heresy Suppression Force (10) Hexy-Shop (1) Hi-Tech (2) highlight (2) horror (1) Imperial Guard (23) Infinity (23) Inquisition (4) Iron Empire (17) Iron Halo (1) Jailbirds (35) Joan of Arc (3) JR Miniatures (1) juggernaut (10) khorne (1) Kickstarter (43) Kill Team (1) Kingdom Death (17) Kings of War (9) Kromlech (3) KST (4) Kurganova (3) Land Raider (1) Large Scale (4) Lead Adventurers (3) legacy models (2) lighting (7) Lizardman (1) Lost Islands KS (2) lust elves (12) made for Infinity (33) Malice (1) Malifaux (13) Mantic (37) mawloc (1) max mini (2) MDF (28) mecha (3) Mechanicum (1) Mercenary Grots (1) Metallic (1) Miniature Figure Painting (7) miniature wargames scenery (3) model building (4) Modiphius (2) Mordheim (24) Movement Trays (1) moving (6) Mystery (4) Mythic Games (1) names of things (14) narratives (22) Necrons (3) Night Goblins (1) Nose Art (1) Nurgle (16) objective markers (2) Obliterators (2) Ogre Kingdoms (6) Oldhammer (4) orange (1) Orcs (1) ork (26) osl (2) P3 (1) Patreon (1) Plague (1) Plastic (4) Post Apocalypse (8) Pre-Heresy (2) Primarch (2) Primer (6) Privateer Press (1) Project Thunderhawk (28) prototyping (1) Proxies (24) ptimer (1) Rackham (2) Raging Heroes (125) Rampage (6) Ravager (1) razorwing (1) Realm of Chaos (1) Reaper (34) red (25) repair (6) resin (28) Resurrectionist (2) Resurrectionists (1) Retinue (1) review (1) ripper swarm (6) ripperswarm (1) Roleplaying (1) RPG (31) runtbot (7) Sacred Heart (1) scatter (7) Sci-Fi Space Battles (6) Scibor (2) Secret Weapon (77) Serene Dawn (12) Setting the scene (23) Shading (1) Silver Compass Designs (1) Sisters of Battle (25) Sisters of Eternal Mercy (11) Sisters of Sigmar (4) Skaven (4) Skin (2) Skirmish Game (8) Slaanesh (1) Slann (1) SnapMaker (5) Spartan Games (1) Sslyth (1) Star Saga (32) Starfinder (4) Steampunk (2) stl (1) Stone Crusher (3) Strigoi (1) studio (1) Studio Miniatures (1) Studio Swelter (4) SUPERCaT (1) Supers (1) Tabletop (9) Tabletop Art (3) Tabletop World (36) tank pit (1) Tantalus (6) Terminator (2) terrain (58) TGG (20) TGG the Game (3) TGG2 (22) The Dickensians (2) The Old World (2) The Order of Vampire Hunters (13) The World That Was (1) Theme (33) Third Party conversion bits (1) Thor Minatures (1) Thousand Sons (1) thunderhawk (3) Titanite Demon (1) tools (2) Toughest Girls in the Galaxy (9) Toughest Girls of the Galaxy (6) Toughest Girls of the Galaxy 2 (7) trukk (3) tutorial (2) Twisted (7) tyranid (12) UAF (1) Ubiquitous Rat (1) unboxing (4) Undead (2) undercoats (4) Undertown (15) Unwritten (5) Urkin (1) Vallejo (5) Vampire Counts (4) Vampire Hunter (2) Vampires (1) Vampiric Flesh (1) Vanguard (4) varnish (2) Vatican (3) vehicle (13) Venom (3) Video (1) Vikings (1) Void Elf (17) Void Elves (15) War Machine (1) War World Scenics (1) Warbands (3) Warchimera (3) Warhammer (13) warhammer the old world (1) Warpath (18) wash (33) water effects (17) weathering (61) weathering powder (14) WFB (1) WH40K (40) WHFB (14) WiP (22) Witch Hunters (5) wood (2) Wood Elf (4) World Eaters (2) Wracks (1) wraiths (1) WW2 (1) Wyrd (5) yellow (1) Ynnari (5) Zoggit (1) zombies (1)
Showing posts with label Primer. Show all posts

Thursday, December 21, 2017

Tabletop World Cottage 2 completed and Dark Souls the Board Game WiP


Tabletop World made a much needed addition to their line with the Small Cottage 2.   Their town houses, inns, shops walls, gates, and mansions are mostly mid size to very large structures so its nice to get a companion to the Cottage 1 model.

Here you see my terribly messy and cramped work space.  I tend to do this even when I have whole rooms available.  Eventually we'll settle down and I'll build some paint racks to help with the access and clutter... buts thats for another time!

The Cottage 2 differs from the rest of the TTW catalogue in that it appears to have a slate roof instead of the usual wood shingle.  At any rate it was my first go at doing slate and I learned a lot.  the colors are fun but came out a bit too regular.  Next time I'll do more partial tiles and work more on making the color boundaries irregular.


I was happy with the moss effects which liven up the walls.  I've also tried a new way to do the stones which really sped up the process and looked a little better to boot! Basically I did the wood first and expanded some of the wood dry-brush step to cover the stone, most heavily near the wood,then washed back with a stone color which gave more color depth and better cover to the recess. then brushed up the stone to give good definition to the wood sections .


Even though the approach was different I wanted to stick with the Greystone Village theme instead of branching out into other colors of stone. I may do some other stone colors in future for buildings that aim to stand out from the bulk of the village.


For the interior I replaced the Spice Brown base layer of the wall color with Sandstone.  The walls ended up being less warm, color wise, and help with the idea that these are lower end dwellings.  I did a bit of sooting around the fireplaces and some progressive water damage in the floors.
 Then, in a terrible "squirrel!" moment I decided to paint up the Dark Souls the Board Game...

I wanted to experiment with using different primer types to speed up the process and ended up with three primer colors.

I used Rust-oleum Universal Metallic Paint+Primer Metallic Aged Copper for most of the adversaries.  This was the worst one of the set and remained tacky until I washed it with Secret Weapon Flesh.  Seems to be OK now but time will tell.
 The Player Character models got Rust-oleum Universal Forged Hammered Paint & Primer Antique Pewter.  This did really well and the hammered effect might be interesting on larger models. Dried OK and took washes well.

I used Krylon Ultra-Flat Camouflage Khaki paint, which is designed for rugged use without primer, for the adversaries that were more "fleshy" or had little armor.  I use this series a lot and it behaved as it always does.
 These are board game pieces and I decided to do a "Good Guy" colored checker on the bases of the PC models and a "Bad Guy" colored checker on the bases of adversaries. The actual colors are TBD!

Here you see the Aged Copper after the flesh wash.  The guy with the GINORMOUS bell/hammer is the mini that actually hooked me into getting the game.


 On the game itself.... meh...

Its very, very, very grindy... much like the video game its based on.  That would be OK except that you end up grinding over the same three tiles against the same adversaries that start in the same spots... the only difference being that the loot chest, if any, is only lootable once.  The tiles are changed for a different three tiles at the halfway point and the grind continues.


So... the minis maaaaay end up getting re-purposed into a cool warband for one of our skirmish games!


And, finally, Three troops of Void Elf Hunters from Raging Heroes are under construction.  I'll  use these as Dark Eldar Kabalite Trueborn.  Since they have a really cool helmet I'm thinking they will form the core of my nascent Ynnari force.


Sunday, October 11, 2015

Dreadtober WiP and Tabletop World Townhouse 2

Picture

The Dreadtober project kicks off with a theme... Something old and something new!


 For the "Old" I decided to dig into the backlog of GW minis that I seem to have neglected lately... but still build something with relevance to my current projects...  Behold the Throne of Judgement!


Construction is well underway so expect some unhappy heretics soon!


The RH TGG interest of the past couple of years was sparked initially by a desire to have cool new minis to use for Sisters of Battle... that will still very likely happen but using the Space Nuns from the TGG 2 Light and Darkness... in the meantime
 I've done a lot of work on three new codices for including the TGG 1 as playable factions in our version of the Grimdark.

HERESY! you say? 

Indeed! 

I'm thinking about having the Witch Hunters/ Sisters of Battle invade my little section of the verse and vent their righteous fury on the Iron Empire... which I've been spinning up as a Necrontyr remnant kingdom in hiding... shhh!  They're mostly hiding from the Necrons!  

So....

I'll be building three Iron Empire Mechas as part of Dreadtober!  Of course... I mean to say that I'll be attempting to build three of them!  The construction process has not turned out to be very intuitive but I think I've... mostly... got it sorted... although there is the pesky issue of four very small parts that I can't seem to figure out the use of....

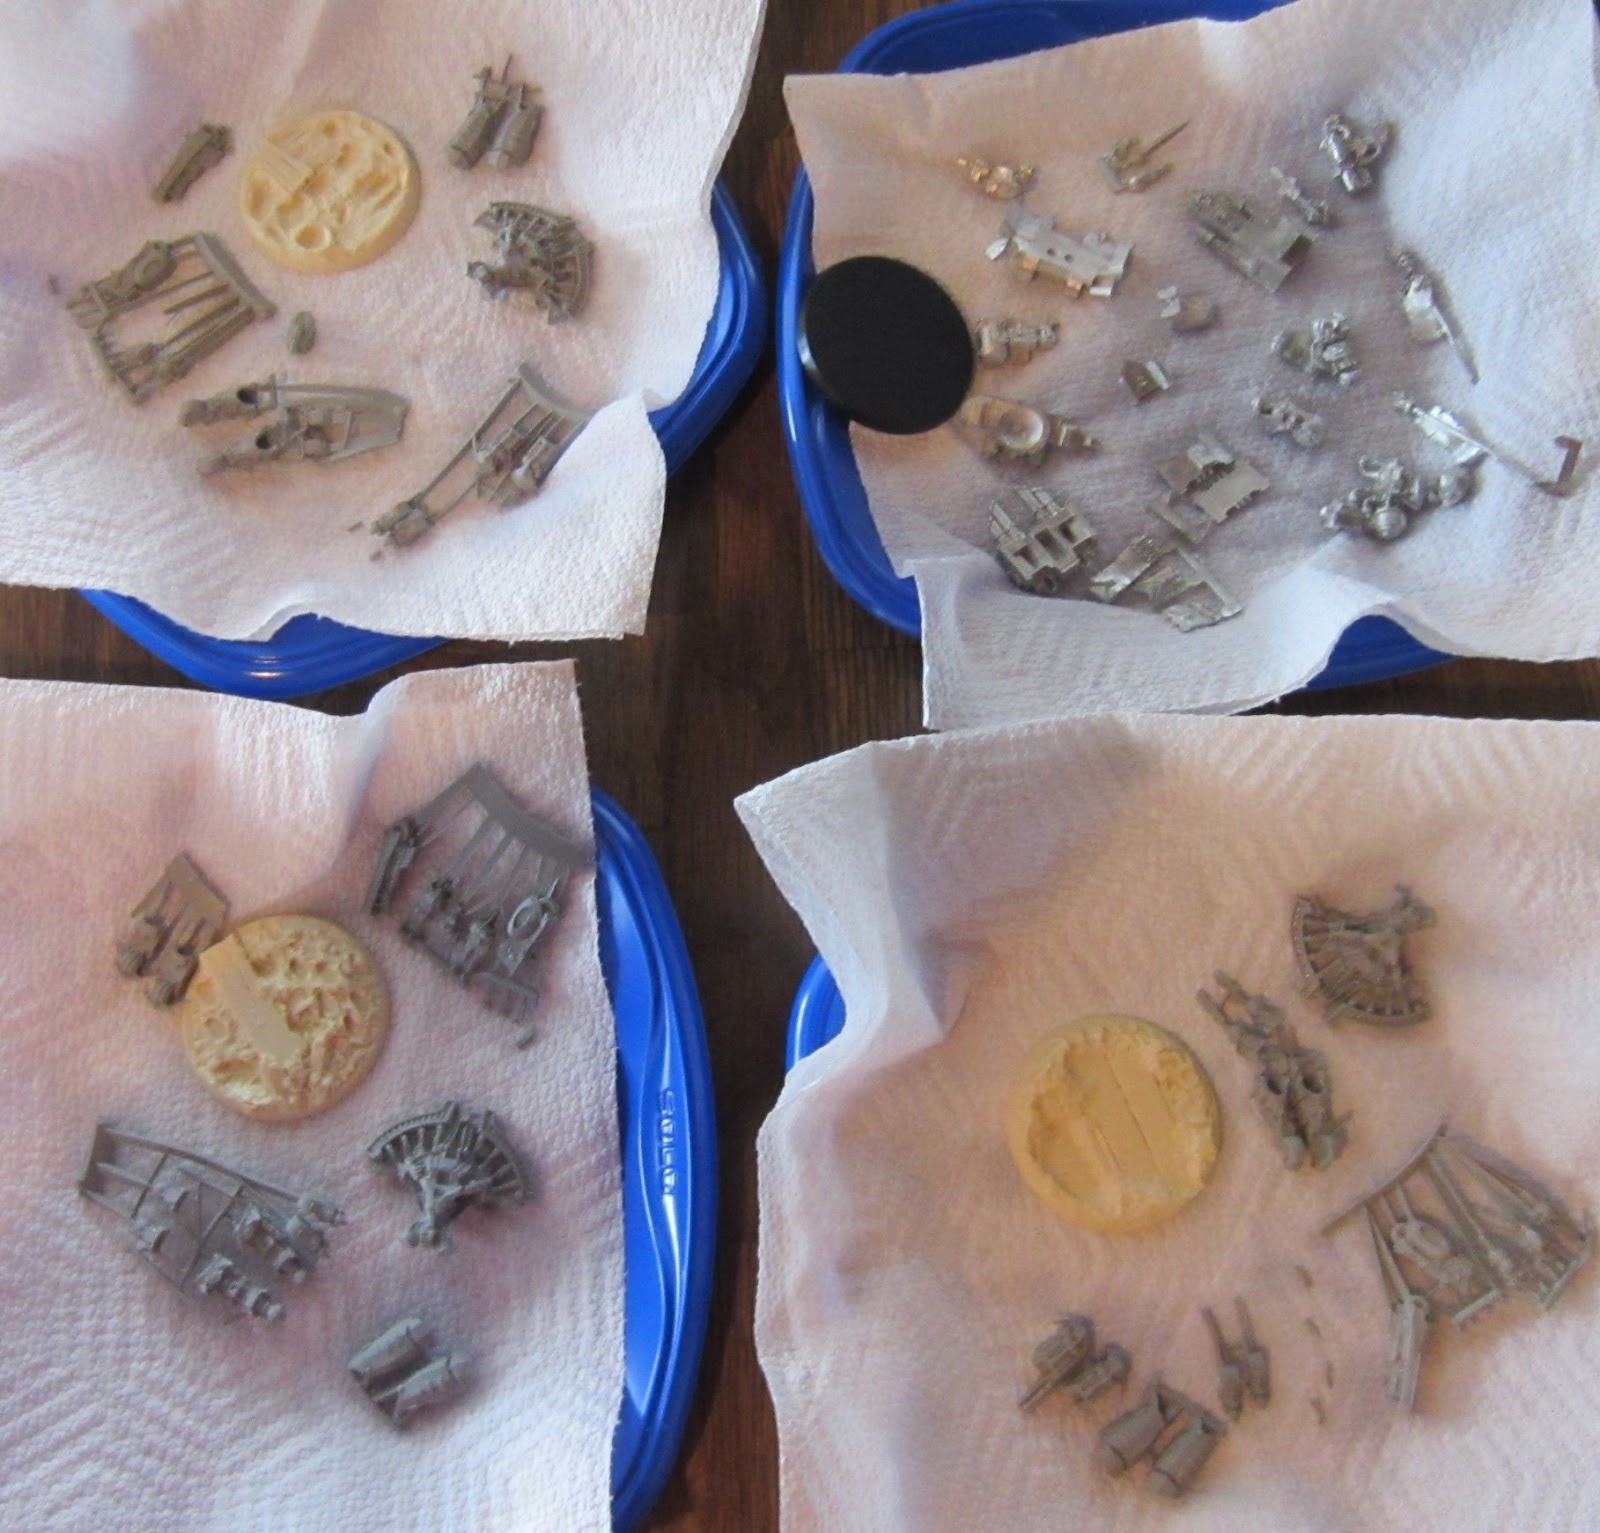
Here you see the four kits drying after the obligatory pre cleaning scrub.


More on those later in the week!


But wait!  To digress I popped out a Tabletop World Townhouse 2 that I'd primer-ed up before the big move.

You see a Reaper Mage standing in for scale.


 The second floor gallery/porch is very cool but is an example of base restrictions.  Bases have gotten a bit larger over the past few years and the 20mm square base for standard humans seems to have largely gone by the wayside (except for those great guys over at Mantic!)
 Which makes the porch unusable by most new minis... fortunately I have a lot of fantasy stuff based on 20s but not much new getting added.  I wonder if TTW will adjust scaling to accommodate the larger footprint of the new style bases in future?  That wouldn't be terribly incongruous if we consider that older houses have smaller footprints... and these are mostly a bit dilapidated...

 The expanded view of all the levels of the Townhouse.  This one is done a little more moldy than usual...


Sunday, August 2, 2015

Tabletop World Stone Bridge adventures and some early WiP on Carneval Strigoi


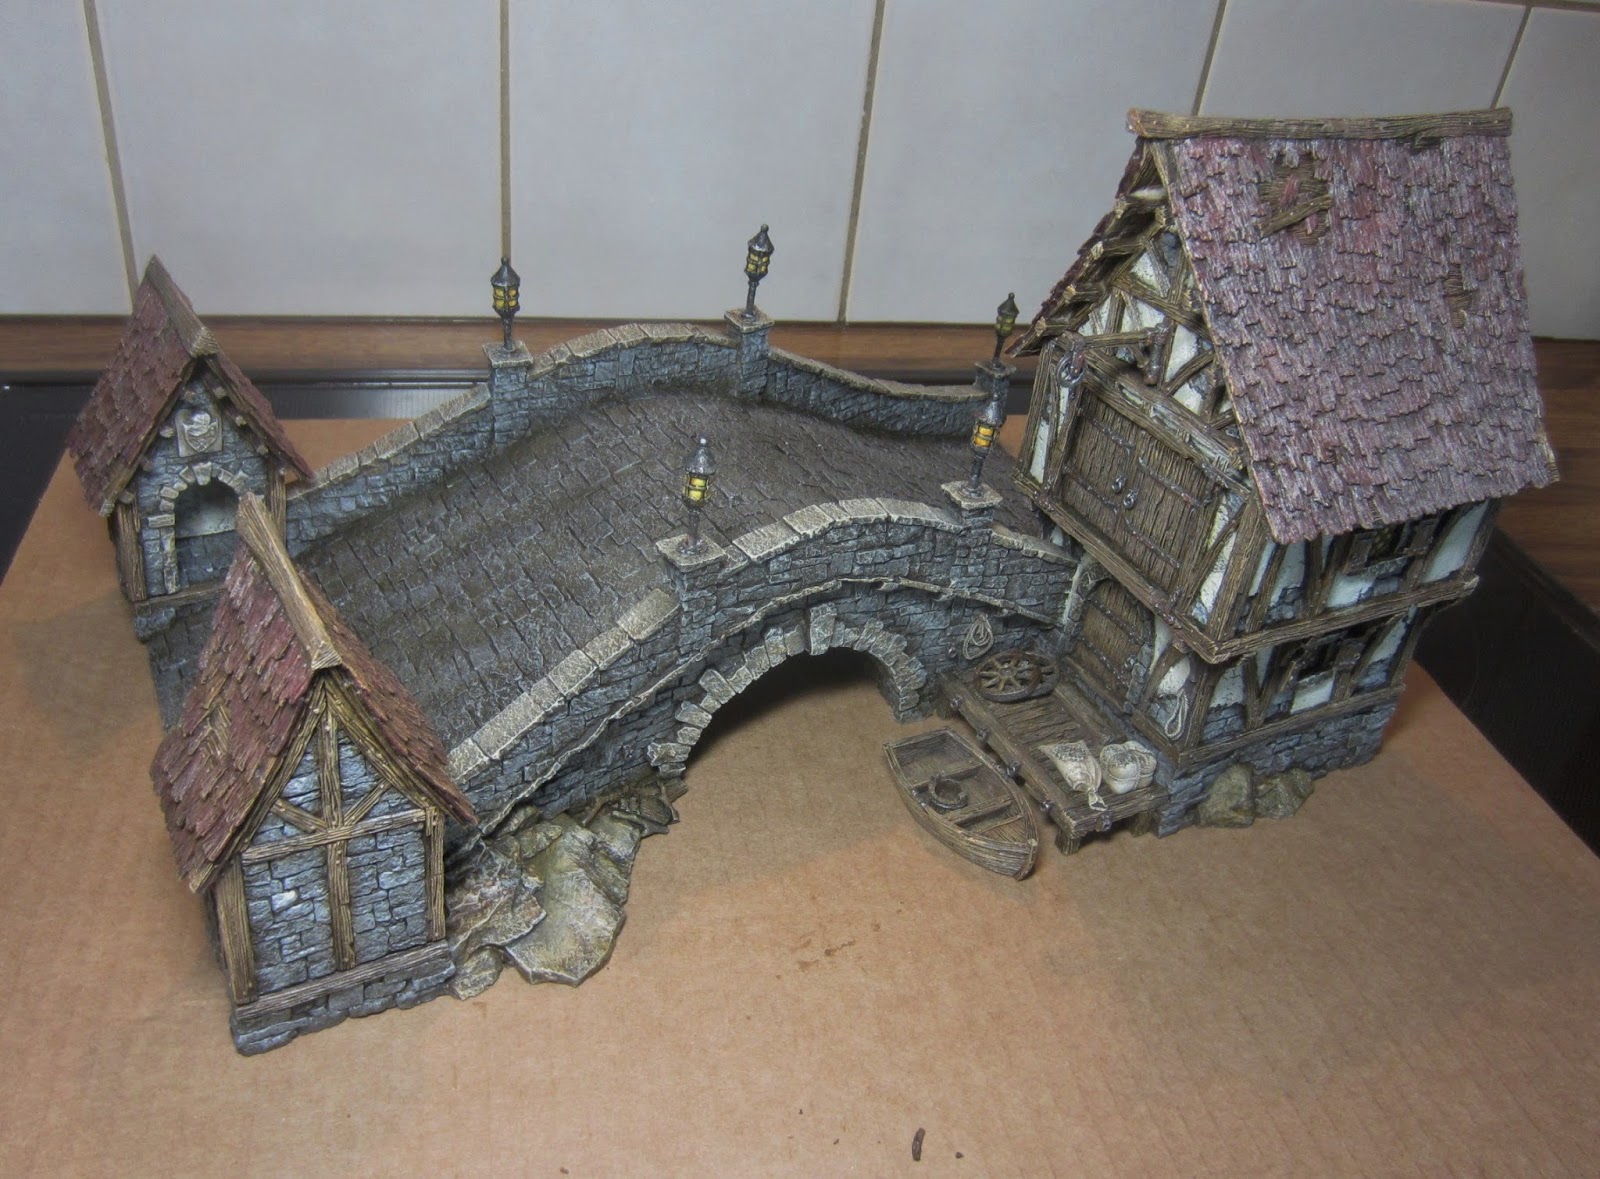
"Nice bridge ya got there Swelter... except for the bit where the shingle is all funny shiny and... odd..."

"Thanks!"  I says...  "and did ya notice that the whole model has that funny effect?  Did ya?  .... uv course you did!~  You was jest bein' polite and mentioning the shingle 'cause its all kinda pink like....."


Well... lets jus get the FAIL out of the way!

What you have here is a clearly labeled can of Plastic Primer.  Its transparent and in a matte finish... but its still Primer and not the Sealer top coat that I was looking for! 

Still I've had a lot worse Primer fail.... heck... I've had a lot worse Sealer fail for that matter.


So yeah... basically I seized that last best chance to destroy a model and sprayed it down with Primer. 


It dried transparent as the can suggests but there is a bit of shiny-ness to it and some color shifts... most notably on the red/brown shingle on the main house. 


I think its recoverable with a little effort on the shingle and some Dull Coat... once I'm able to get some...  but otherwise the thing looks ok..... the rest of it seems mostly to just be a bit shiny.. which the Dull Coat should solve... Famous last words!


On to Carnevale  and some very pasty Strigoi getting their subsurface done...  mostly in Reaper Vampiric Flesh triads... because... Vampires!... and some Blue... just because I spilled a bunch... its been that kind of day around the studio!

Time to but the brush down and grab a beer! 


Saturday, July 18, 2015

Tabletop World Stone Bridge Unboxed and Primed


 Getting things started in the new digs with a project from Tabletop World!  The brand new Stone Bridge just arrived this week so here it is.


As you can see the box has been dropped on a corner and looked like it had gotten wet as well.  Needless to say I approached opening this with some trepidation.  I did notice right away that this was a sturdier box than TTW usually uses.  There regular boxes are thin with a lot of give but the packing method compensated for that as you will notice.


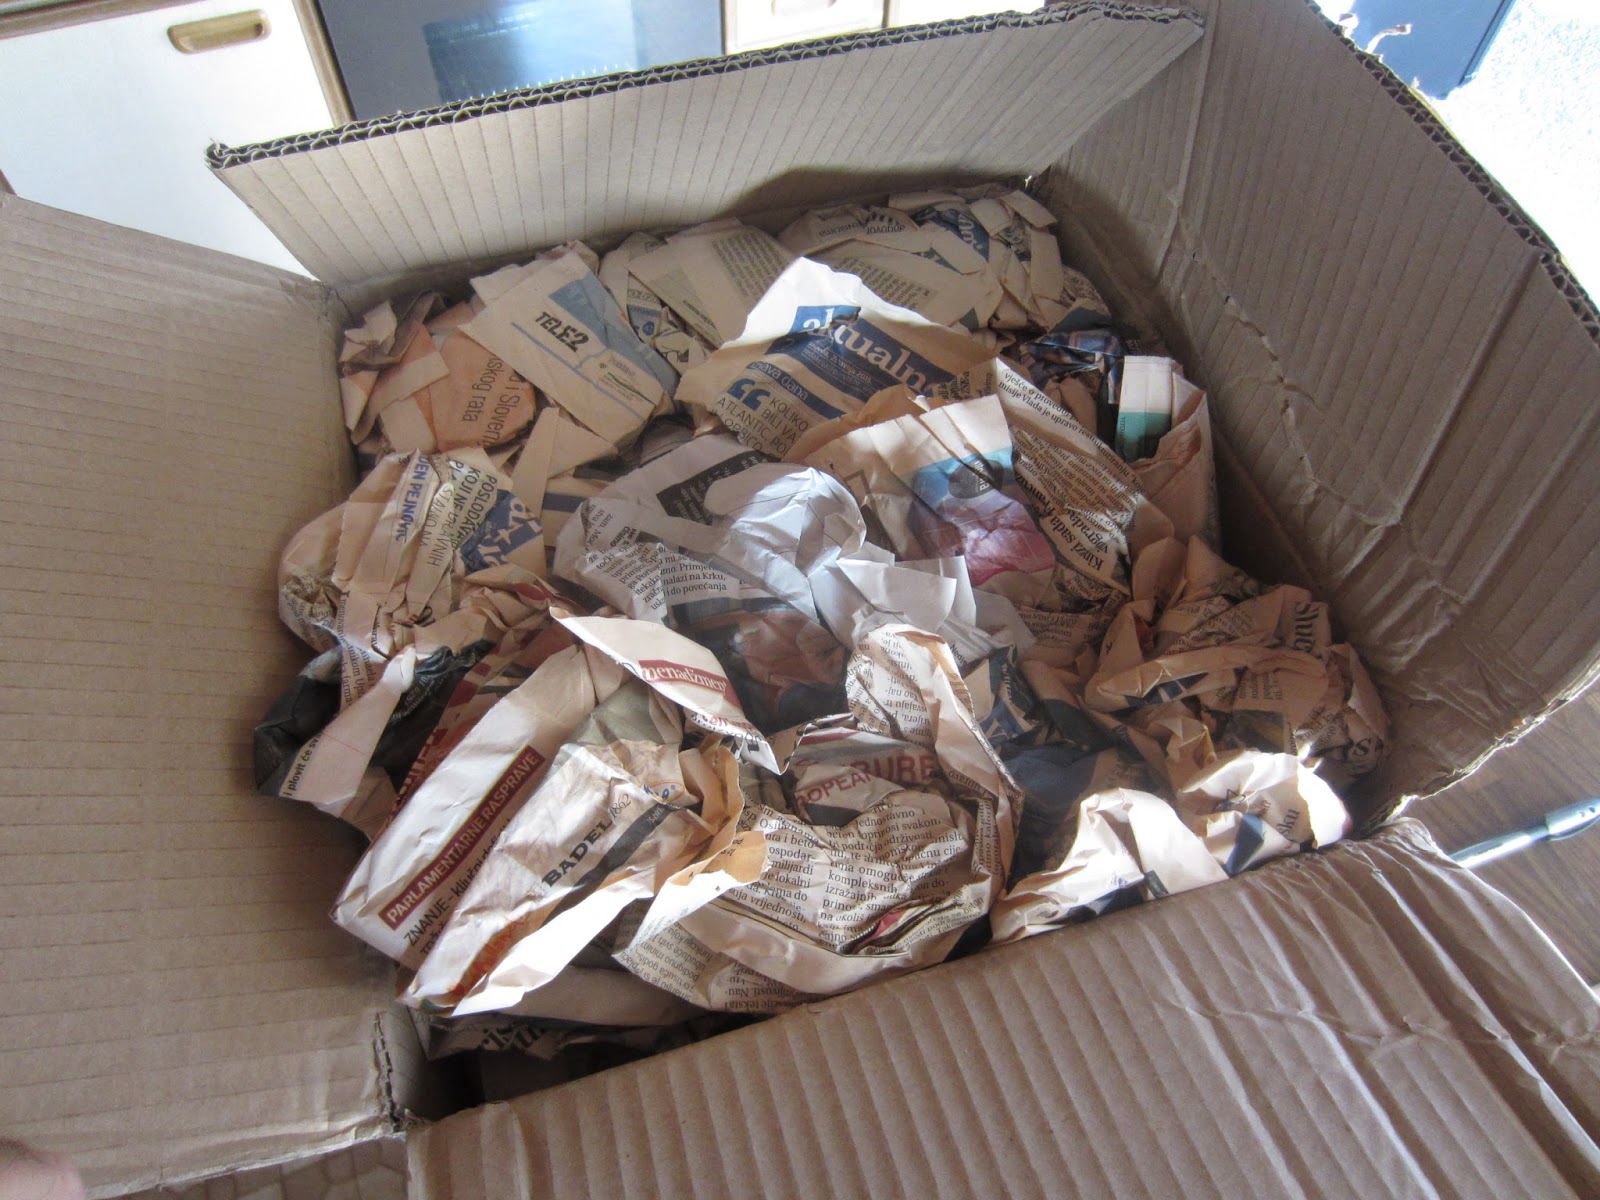
As per usual with TTW the box is well stuffed with old newspapers wadded into balls and used as very effective shock absorbers.


You can the bridge emerging from the newsprint wadding.  Completely cocooned and well protected from shock.


 It needed that protection this time and it worked very well.  No damage to the model at all.


One of the big reasons I'm a total TTW fanboy... aside from how cool all there stuff looks... is the amazing care and attention to detail in the model prep and shipping.  Here you see the pieces right out of the box come pre-cleaned and pre-fit.


 I literally just placed these guard shacks into their snug fit slots... no gap, no irregular surfaces to file.... heck... it might even have made a small "click" as it sat into its position.

The lanterns for the bridge lighting fit the same way looks like I'll be able to leave them as separate components for transport purposes.

This is exactly what I want when I buy a premium kit... no tools required, especially no power tools, to beat the kit into shape...... BooM! There it is!


The roofs come taped onto their building structure and it seems to help with the transport survival.   It also makes a great box for the fiddly bits!


 The small parts are bagged and placed inside one of the building sections which is then taped shut with packing tape.


  The smaller parts are expertly cleaned and pre-fit just like the big parts.   This step save you some serious time and moves the risk of breaking a part during cleaning away from the purchaser and onto TTW...just WoW!


So the unboxing went well and its time for the Primer.  Yep... from previous experience I know that these things have already been washed and have practically zero mold release residue... I've occasionally given myself an adhesion problem with a sub par wash job so well just shake up the can and let it rip!


.... aaaaand FAIL! 

Your fabulous host is demonstrating just how rusty you can get when you step away from the bench for a couple of months....  I was certain that I was spraying these black!   Guess again.... its a dark camo brown... AAAiiiieeee!!! I had to spray ALL of it.... seriously!?!...  ack!  

Ok , ok, breathe.... Imma go with:

"I primered the model this brown color instead of black because its a water feature and it would have a different tint to the weathering due to all that muddy water being splashed all over it during every day and night of its working life.... not to mention storms!  Did I mention storm surge and .....browwwwwn?"

Yep THAT is my story and I'm sticking to it!  Yep... I suuuuure am..... really.... it's true, I say,  TRUE!

Friday, March 13, 2015

Warchimera Bunker and a Reaper Dumpster


 I love when stuff is  ready to paint right out of the box/bag.  Cleanup and prep has to be the most onerous task in the hobby for me.  So I was very excited when this Bunker from Warchimera required zero clean up... which means it gets to move to the top of the paint queue!


I'm trying out a new workflow to mix up my paint subjects and add in a single simple project that can be completed in a short sitting before proceeding to the more complex job of the day... kind of a warm up piece.  This Bunker is one of those.


I like the paint and glue friendly resin on this and painted it largely with various primer sprays (all Rustoleum this time since they were on sale for $3.00 a can...  flat black, for the floor, Camo Beige and Camo Green for the walls and roof) before adding some weathering effects via Forgeworld powders and GW technical paint.


 I added some signs from Verlinden spread the Forgeworld Powders dry and then set them with Rustoleum (That sale again!) Matte Sealer.


One-Shot Blondie has discovered Charlie rooting through the trash! 


The Dumpster is from the Reaper Bones II Kickstarter and is really a white hard(ish) plastic and not terribly similar to the rest of the bones material being , thankfully, quite rigid.  It opens up so will be great for hiding stuff during games. It was the another basic session starting piece done with green camo spray paint and weathered with Secret Weapon Washes, GW technicals and dolled up with some signage from Verlinden.


Monday, December 5, 2011

Dark Eldar Tantalus Brass and Structure WiP and Venom Strike Group wraps up.


 The Venom Strike Group is finished... no more proxies!

The Tantalus brass is integral to the structure of the kit.  It's not a thin brass etch but a hefty piece of the structure that holds the thing firmly in shape!  I also like the touch where "This Side Up" is effectively printed on the brass frame.

Here the mast footer is attached to the brass for stability and the mast footer mounting also serves as a backstop for the central engine mount.

The second set of plates lays in just above the main deck and guides the upper rear hull into position resulting in matching attitudes for the major blade structures that form the rear wing of the completed model.  This whole system allows for an exceptionally ephemeral look that would otherwise be hard to pull of in a model this size.

I'm experimenting with primers on this project.  Typically I've used black on everything and worked up from there.  This has made some of the red areas require an egregious number of layers to get to the right clarity of color.  For this build I'm priming the engine compartment and underside of the hull black as usual but am hitting the rest of the kit with Army Painter Rat Fur which is a reddish brown color.  I think this will allow me to red up more rapidly and still be dark enough of a subsurface to make the other colors behave as though they were painted over black.

My main concern is to match the color tones of the rest of the army which, for the vehicles, has been worked up from black throughout.

For this last shot the engine area that will be under the brass deck is being worked up as are the main engines.  once these are done I'll mask them and add Rat Fur to the hull section that is currently showing a light black over-spray.

The command deck and rudder assembly, and the side Blade Vanes are also built and sprayed Rat Fur at this point.  I haven't used this particular primer before and its taking just a bit longer than usual to dry but the coverage is very even and applied easily.