Painting Laser Cut Counters:
I recently got a couple of sets of laser cut counters from Silver Compass Designs. They have a well illustrated and entertaining tutorial up on their Facebook page that shows how to paint their counters in a quick and easy way. Following their tutorial you get very cool looking counters that look like this:
But to me accessories like Laser cut counters scream out for a little extra attention.
So here is how it came to this...
I decided to go for a two tone shading style that is common in comic books. I like the feel of that for the Orks.
The first thing I saw after the counters arrived is that they has a fair amount of dust left over from the cutting process. This is completely normal and is easily cleaned up with a paper towel and an old, clean, drybrush.
The next thing to do was lay out the highlighted areas. I elected to start with Goblin Green as the highlight color and painted it on being careful to paint the side walls of the etching as well as the flat surface. This is important as the sidewall areas are visible from the front of the counter and a complete sidewall will give a much sharper look. Failing to paint the sidewalls completely will also leave pinholes in the color that is highly visible.
Once the this is applied flip the counter to check for pinholes and sidewall coverage
Here you can see missed spots and check to see if the lines need dressing. These lines can't be altered after the next color is applied so check them thoroughly here. On this counter I missed the space in the corner of the Jaw. I apparently did not completely correct that and you will see it again!
I next applied a line of bleached bone to the lower portions of the bones and, when dry, a coat of Skull White to the remaining areas of bone.
Then I did the coat of Snot Green to the remaining area of the face.
At this point the Skull and crossbones might seem complete but they are not.
Since you end up applying a backing that is dark this might not matter but I decided to do a second coat to clean it up and even things out.
Then it was on to the lettering!
I chose Tausept Ochre as the shade color and Sunburst Yellow as the primary.
I started by painting a line across the lettering with the Tausept Ochre. After getting the line established I checked the front to make sure I had good fill and decent lines.
Once that was done the Sunburst Yellow got liberally applied to the remaining areas of the lettering making certain that the sidewalls were well coated and that there were no pinholes.
There had been a few pinholes in the Tausept Ochre that escaped my notice so the second coat would end up being done in that color to clean things up.
The Second coat of Tausept Ochre marked the end of the painting part. There still remained the felting which has a few quirks.
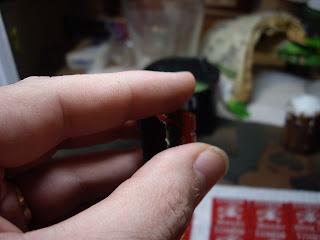
The first one is that the felt shapes are also laser cut which means that the layer that needs to be peeled off does not have a pronounced grab area making it possible to accidentally peel the entire adhesive area off by mistake! I encountered this while doing the 1 shot counters so was ready for it on these.
Above you can see where I accidentally peeled of the entire adhesive and below is a good peel showing the adhesive area still attached to the felt.
Pete commented on this felt peel with a great tip!
"The felt backs, I've found it's easiest to get off the wax paper by lightly scoring the paper with a blade so you just barely cut through the paper but not the adhesive, then you can bend the entire piece along the score and then easily pop off the paper." ~ Pete B. Silver Compass Designs.

After correctly peeling the felt aligning the backings was easily accomplished by holding the two parts is such a way that a finger was guiding the edges on three sides in one hand while the other pushed the parts together.
After this all that remains is the removal of the top protective layer. I was not initially certain that this existed because the laser cut makes the edges non existent but I could see that the surface was filmy looking and then notices a peice where the film had been damaged which confirmed it.
The Final Peel!
 Before and after the final peel.
And the complete set of Wrekk'd counters.


No comments:
Post a Comment